
We hear the stories about how naturalists used to spend their time discovering new species by foraging in dense jungles and sailing the seas looking under crude microscopes like they did in the time of Charles Darwin.
Technology evolves, and today, there are a lot more digital reports and computers involved in conservation and biodiversity sciences. The past we are familiar with is certainly romanticized, and with everything so digital, it feels like there is little left to discover in the world.
Fortunately, that’s far from the truth: scientists are still discovering over 15,000 species every year. (1) Citizens’ science plays a huge part in those discoveries, as well. You don’t have to be a trained scientist-by-trade to be a part of those groundbreaking discoveries.
The advancement of technology means that most naturalists have a smartphone in their pocket, right next to paper manuals written by current and past authorities. While a smartphone will never replace structured and dedicated hands-on learning, they can still be an excellent tool for discovering a love of nature and documenting observations; all without relying on paid classes, availability of mentorship, or other logistics that might prevent you from enjoying the outdoors.
In this resource from HerbSpeak, you’ll learn what you need to know about the free app and website iNaturalist, including an in-depth look at how to use the platform.

What is iNaturalist?
As a US-based 501(c)3 nonprofit organization, iNaturalist strives to advance biodiversity science and conservation by creating a community of observers and identifiers. Anyone can be an observer, and anyone can be an identifier. With helpful identification guides, comparison modes, and a computer modeling program that can help you identify your organism based on coordinates and the images you upload, the platform encourages real learning about the natural organisms around you.
Notice
This page is a how to guide for iNaturalist. If all you want is a quick primer and a link to the tool, check out this page instead.
The iNaturalist app is a condensed version of their website, which has more features and functionality. It’s easiest to start out with the app, but you’ll find that you might prefer doing things on the website for ease, especially if you choose to interact on the platform in more ways than just making observations.
Learn How to Use the iNaturalist App
Seek VS. iNaturalist Next

A quick note – you might be familiar with either iNaturalist, or Seek by iNaturalist. Maybe you’ve heard of both, and you’re wondering what the differences are.
iNaturalist, also known as iNaturalist Next, is the mobile app that is connected to a community of identifiers, and observations will be submitted for scientific use if the observations reach Research Grade. If you are not sure which to start with, I would recommend iNaturalist Next for the baseline experience. You get to choose your level of effort and learning as you go. It’s really not as intimidating as it might seem at first. If you have privacy concerns about specific observations on iNaturalist, there is good news for you: you can obscure locations! We’ll talk about best practices for this later.
Seek, on the other hand, is not connected to any of these other resources. It is meant to be a self-contained identification app. While you don’t get the benefit of the community and don’t contribute to scientific research with this app, it has its place as a useful app if you want to identify organisms but have concerns about being online. A popular use for this app is also to help children identify organisms around them. If you would like to connect your Seek account to iNaturalist and record your observations through Seek, you can do that through the Seek settings. At that point, however, it’s just a better experience to use iNaturalist. If you have children who you don’t want accessing the internet or the social features of the app, it’s still best to use Seek.
'iNaturalist Classic' in the App Store
As a side note, iNaturalist Classic is a depreciated, old version of the app that you may still see in the app store as of this writing. This will eventually be removed from the app store, but it is there while their userbase transitions to the new app.
Personalizing Your Settings
When you first make an iNaturalist account and log in, you’ll want to take some time to set up your profile and personalize your settings. Remember, your profile can be viewed by anyone on iNaturalist, so talk about your experience in natural settings, your goals with using the app, or just share some fun things about you.
While personalizing your settings can be done in the app itself by selecting the three-bar icon in the bottom of the app and going to Settings, the easiest way to do it is on their website. iNaturalist’s website has more features than its app does, and updating your settings is just one of the things that has a better user experience on the website.
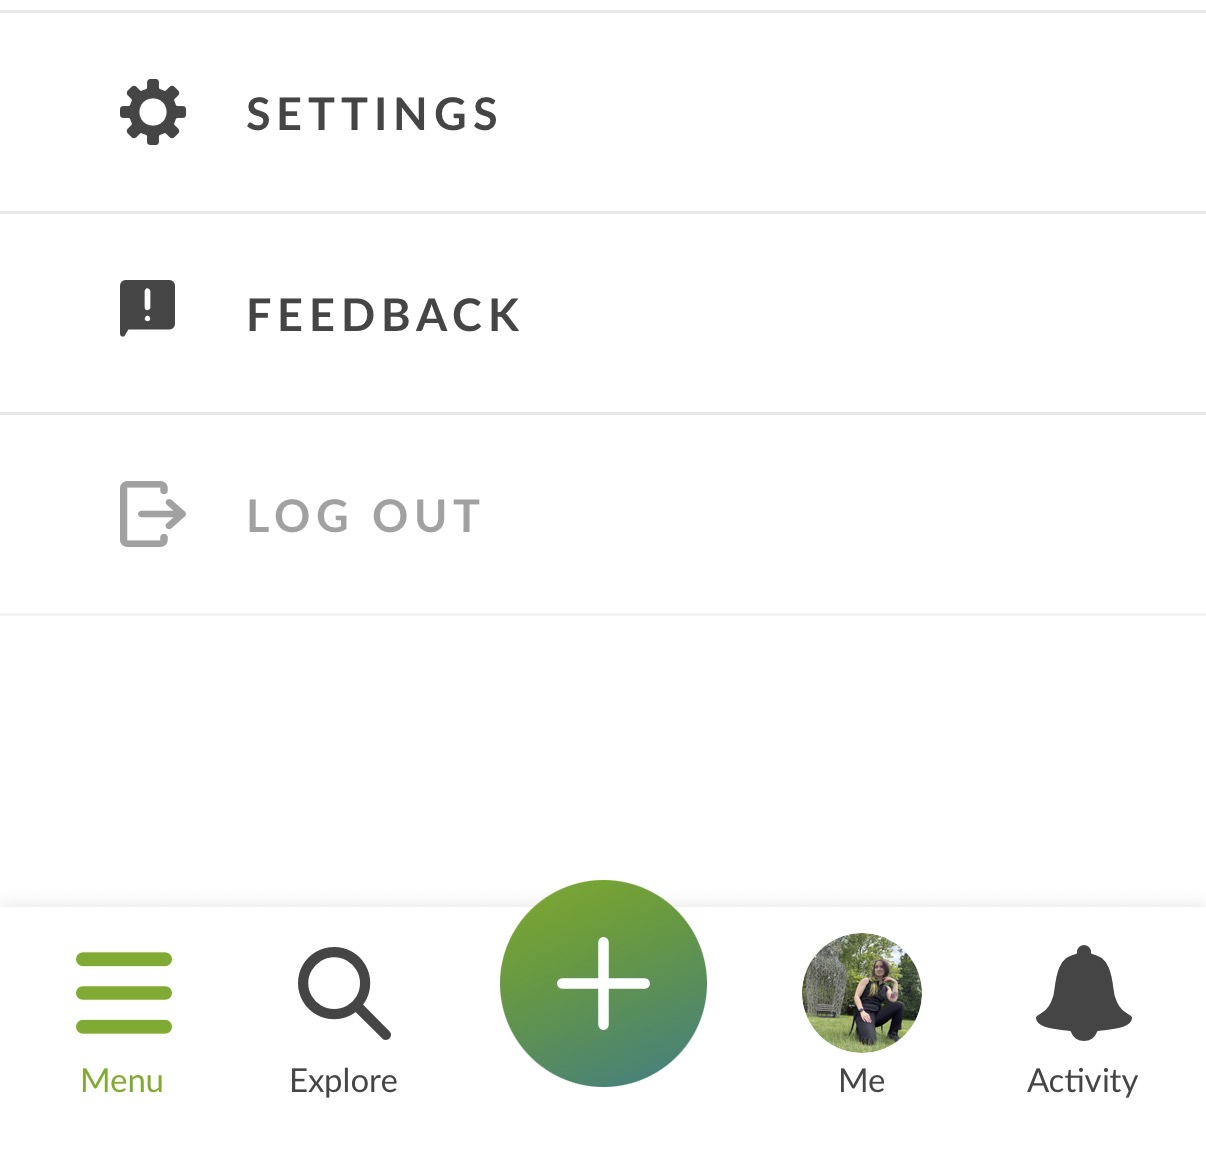
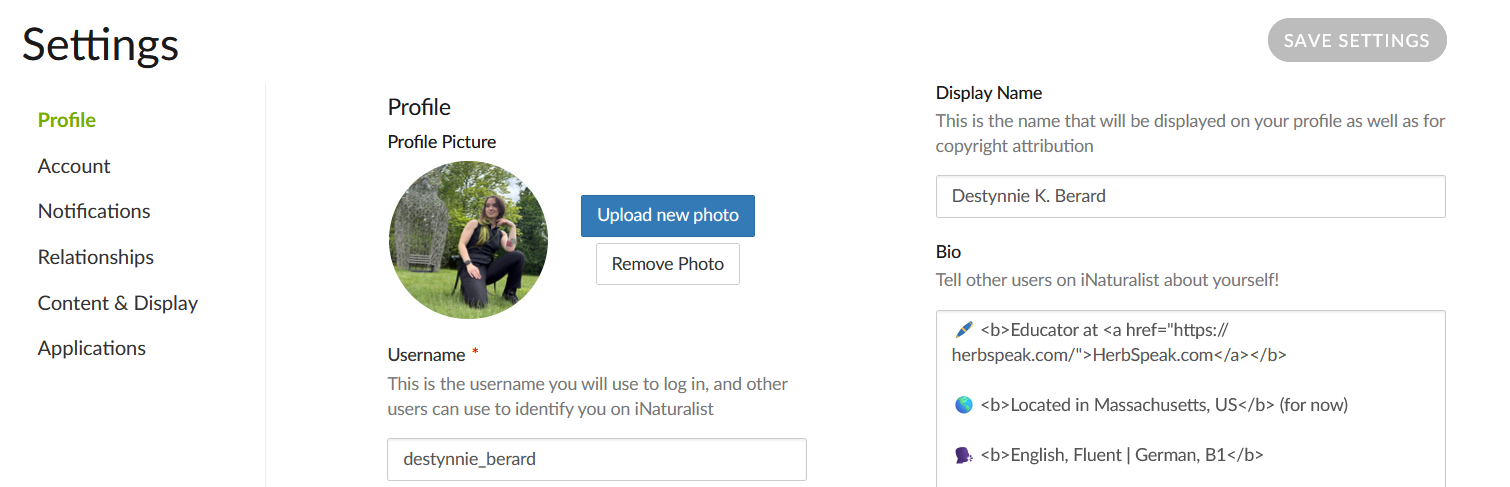
When you log into the website version of iNaturalist, you will see your profile in the top right corner. Hover over that, and go to Account Settings. You’ll be brought to a splash here, where you can customize your experience and get the most out of both the website and app.
The Profile section is where you customize your profile. Fill out everything you’d like to, from what you’d like to be called to how your name displays, and the information in your bio. You can also change your account email and password here. In the Account section, you can customize things like default search zone, app language, timezones, and privacy consents. Notifications allows you to, of course, customize the type of notifications you receive for different actions and interactions across the platform.

Relationships is another section, where you can add other users on iNaturalist who you want to follow. By following them, you will see their posts and activity in your feed. When you add someone, you can also check to ‘trust with hidden coordinates’ which will allow these users to see the more precise geolocation of observations you make and manually obscure to the public.
Content and Display settings have some of the more important settings to customize for your experience across the app. You can choose which projects can add your observations (more on projects later) and whether you’d like to see common names or scientific names first, or just the scientific names. Setting this to your real preference will provide you with a better experience in making observations.
You can also select other settings, such as how the community identifications should affect your observations. If you opt out of this, your observations cannot be research grade unless your observation agrees with the communities’. Customize your taxonomy and field preferences here as well.

The next thing that will change your experience on the iNaturalist platform is the Licensing settings. Take time to read through the differences here, and really put thought into how you want your observations handled. You are uploading your photos as a part of the observations you make on iNaturalist, and you should select a licensing option that suits your preferences. This is particularly important for anyone who wants to upload their skilled photography to the iNaturalist platform, not just cellphone photos. Take particular note of the Learn what these licenses mean link. Click on it, and read over what the different options are.
Be sure to save your settings before moving on to a new section when updating your preferences.
Types of Organisms You Can Submit Observations For
There are a few guidelines beyond this for what iNaturalist is for, and what it’s not used for. On the About page, iNaturalist notes that this platform is not for use as a repository of external data. It is not a way to back up your photos as all photos submitted get resized and reprocessed. It’s not a tool for mapping inorganic items, and not a way to collect secret or confidential information.
iNaturalist is used for curating observations of organic organisms, particularly those that are wild. From the iNaturalist team themselves:
“iNaturalist is a lot of different things, but at its core, iNaturalist is an online social network of people sharing biodiversity information to help each other learn about nature. It’s also a crowdsourced species identification system and an organism occurrence recording tool. You can use it to record your own observations, get help with identifications, collaborate with others to collect this kind of information for a common purpose, or access the observational data collected by iNaturalist users.”
The types of organisms you can submit observations for are generally categorized as birds, amphibians, reptiles, mammals, ray-finned fish, molluscs, arachnids, insects, plants, fungi including lichens, protozoans and unknowns. A good rule of thumb: if it can be classified into a species and genus, then it is fit for iNaturalist.

Making Good Observations
Making a good observation can be really simple, but it might not be obvious how to at first. After all, you’re mostly there for the computer modeling suggestions, right?
Well, if you want to get observations to the research grade criteria or engage with the community at all – and if you’re on iNaturalist, that’s most of the point – then you’ll need to take good photos and be sure your data is clean. While iNaturalist has released a couple of tips on how to take good photos overall, (2) there are still plenty of observations on the platform that aren’t identifiable because they don’t follow these practices.
As you take photos of specific organisms, you’ll learn what the best identifying marks are. For example, taking a photo of your common ladybug might seem simple, but did you know there are over 5,000 species of ladybug? You really need to get a clear photo of its head and shell to accurately identify the one you’ve found.
Tips for Photographing Organisms
Basic tips, no matter what organisms you are making observations for, include:
- Get up close to the organism. You can still take habitat or growth-pattern photos from far away, but make those additional photos to your close-ups.
- Take pictures from multiple angles, such as the body and head, or from the stem to the petioles to flowers and leaves (top and bottom.)
- Submit observations of wild organisms only. If you suspect they are cultivated or captive, mark it as such.
- Do not edit your photos in any way. Editing beyond basic cropping can make photographs more difficult to observe, not easier. The exception here is clearing background noise from an audio upload to better highlight the sound you are trying to identify, and trimming audio clips so there is not a lengthy silence before or after.
- Backlighting can help. For organisms like plants, placing your hand or a blank sheet of paper behind it can help remove background clutter and colors that make it otherwise difficult to identify the small but important characteristics.
- The clearer the photo, the better. While zooming in really closely can provide some additional identifying marks, it usually results in a grainier photo. Crouch, reach up, get close – whatever you need to do – but take photos that are as clear as possible. Photographers with DSLR cameras are at a distinct advantage here, but sharp photos can be created with standard smartphone cameras with similar quality if you learn how to use it correctly and adjust your native camera settings.

Tips for Uploading
- Only identify to the extent of your certainty. Even if that is “Aves / Birds”, or “Plantae / Plants”. Don’t leave it as unknown, and don’t try to get it down to species or subspecies if you aren’t sure. ID to your comfort level and knowledge. The platform’s community is welcoming and accepting of doing this, and there are plenty of resources to learn from.
- Ensure your data is accurate. That means editing your geolocation data if necessary to obscure it for sensitive species, adjust the accuracy (larger or smaller circles by zooming in and out) or modifying it to exact locations from when you took the photo, if your camera scrubs or doesn’t collect location metadata.
- Make plenty of notes. There is a notes field when you upload an observation, and you can go back in (particularly on the website) to add field data. You can visit your observation page after it is uploaded to add even more annotations.
- Group multiple photos of the same organism. If you’ve taken four different photos of the same dragonfly (the same individual at the time of observation), you will need to group these into the same observation. The exception to this is if you are observing multiple of the same species; split those out. The second exception is multiple observations over time, even if it is the same individual; these should be split.
- Different organisms should be split. Even if they are in the same photo. Try to crop to the organisms you are ID’ing for, be clear about it in the notes.
Making an Observation in the App
On the website version, you just need to select Upload and drag and drop or select your photos to upload observations, then fill out the fields. These photos must be your own observations and accurately represent your observation; no guessing about time or location.
Most people use the app to make an observation, so we’ll switch from the website format to showing the functionality of the app here.
Once you’ve downloaded the app and signed into your iNaturalist account, you don’t need to sign out again. This should allow you to open the app to your personalized home screen every time.
From the home screen, tap the big green Plus button in the bottom middle of your app. You have several options here. Take Photos, Upload Photos, Record a Sound, and ID in Camera. You can also choose to upload an observation without evidence, which allows you to start completely from scratch in the observation information screen. The first time you upload a certain observation type, you may need to give iNaturalist access to certain permissions on your phone – to be able to see your camera roll, or to be able to access your camera or microphone to record observations, for example. You will need to accept these permissions for that feature to work.
Take Photos allows you to take photos by accessing your camera. Each photo you take will be stored as an observation, allowing you to take multiple photos for the observation. Be sure to make your observation and fill out any additional information before switching to another individual or observation subject. Observations should be limited to one subject individual at a time.
When you are done, click the green checkmark next to the camera shutter button, and you will be taken to your “New Observation” screen where you can fill out identification details.
Upload Photos allows you to browse your camera roll for photos you’ve taken with the native smartphone camera. I prefer this because it tends to allow you better control over the photos you upload, especially if you are like me and tend to take several photos to get one that comes out perfectly in-focus. This also allows you to take the photos in the field, and upload them at a later date. Observation details will default to the geolocation and timestamp stored in the photo itself, so you don’t have to adjust this manually later on. (If you are having trouble with this, make sure this metadata is collected in your native smartphone camera settings.)
Selecting Record a Sound allows you to capture sound recordings with your device, similar to how the app will open a camera for you to take photos within the app. Here, instead, it is a sound bar. You will need to select the microphone icon to begin recording your sound clip. Like all observations on the platform, this should only be used to record sounds of organic organisms that can be identified to a species – not manmade sounds. If you can, do your best to describe what you are trying to identify in the notes section, or pair it with photo evidence for better identifications by the community.
Finally, you can ID in Camera which is a very similar feature to how their Seek app works. If you rely on this, however, you’re likely to get a lot of broad-level identifications, such as “aves” or – when trying to identify plants – “dicots” or “monocots”. Sometimes it will bring you down to genus or species of the organism within your camera view, but it isn’t always accurate.
In my opinion, the best results come from the Upload Photos section by taking good photographs, entering detailed information for your observation, and relying on the help of the community.
More Features on the Website
The app is, as previously mentioned, a condensed version of the website’s features. You could spend an entire day doing so as I have often. The homepage is typically your community feed, where you can see iNat announcements, navigate to common tabs and features, and see observations that your friends have made, or any updates to taxa you have followed.

From underneath your username, you can go to common areas of your own profile: Home, Profile, Observations, Edit Observations, Calendar, IDs, Lists, Journal, Favorites and Projects.
Your Profile is the preview of your own profile with all the same tabs there.
If you go to Observations, you’ll get a filtered list similar to the top-bar observations page, except it will be filtered for your own observations.
Edit Observations is a list of the observations you have made with options to change each of them; probably one of the features you will use the most on the website version outside of Observations.
Calendar is a yearly calendar with a capture of dates that you’ve made observations on. You can click in and view observations made on specific dates. IDs is a list of all the identifications you’ve made for others on the platform.
Lists is a collection of your, well, lists. You have a dynamic lifelist by default, which captures all the species you’ve observed on iNaturalist. You can also make new lists and customize it as you’d like.
Journal is a fun blog-style feature that allows you to make public journal posts about the iNaturalist experience or observations and identifications you’ve made.
Favorites is any observation that you have added to your favorites list, which is a little star icon underneath any observations’ geographical map.
Finally, Projects is a grid of projects you are either a part of or admin.
Naturally, you also have the options in the top bar to check your personal messages from other users, check your notifications, go to your profile and settings, and upload an observation. You also have the ability to search taxa, projects, regions, and users in the top left corner.
Observations Page
The observations page allows you to filter, select, view observations based on a geographical map. Your default search filter can be changed (mine is set to the United States) but you can see a range of options to select your view type (Map, Grid, List). You can select types of basemaps, and filter by Species, Location, and any additional filters you would like with the grey filters icon in the top right. The filters tab is going to be your best friend when searching for different taxa in different locations.

The Community Tab
This includes People, Projects, Journal Posts and the Forum.
People allows you to browse users on the iNaturalist platform. You can also see the leaderboards here, as well as who has the most observations of the year, and a list of curators.
Projects allows you to browse the public projects, which are collections of specific organisms, specific geographies, specific purposes, or a mix of all/any. Examples include “UV Fluorescent Organisms” or “Freshwater Molluscs of the World” or “Friends of Hopewell Meadow”
Journal Posts allows you to browse the public journal posts of all users on iNaturalist.
Forum will take you to the community forum which is a separate area away from the iNaturalist platform, and requires a second account to be made. It is, however, still on the iNaturalist domain and still about iNaturalist. It functions like you would expect a community forum to.
You will also see a list of Projects that you have joined in this section.
The Identify Page
The Identify section of the website is where you go to make (or agree with) identifications on other peoples’ observations. Like the observation page, you can filter for anything you want, allowing you to either broaden your horizons or narrow in on a specialty in your identifications. Once you click onto an observation, you’ll see a popup with all the relevant information.

You have several controls on the photos to help you get a better look at the organism. You can click on the photo to zoom in. Or, use the buttons on the side to adjust the brightness up and down, or open the image in a new tab, and scroll between photos at the bottom.
At the bottom, you have the option to add to favorites, or mark as reviewed which will remove it from the list of unreviewed observations up for identification. You can also mark it as captive / cultivated, which is helpful data annotation as only wild organisms are allowed to be research grade.
You can view the geographical and observer information on the side, any notes made from the author, and add an ID or comment on the organism yourself.

When you go to add an ID, you will be asked to search for a species that you want to put up for suggestion, and detail your reasons why you think it is this species.
The more information you can give to back up your claim, the easier it is for others to agree with or dispute your reasoning based on their own knowledge and expertise. Faulty reasoning might land the organism on a different species, but correct reasoning will help others agree confidently. When making an identification, you should only identify to the best of your ability. No guesswork, and no blind agreements; add an identification if you think that you can either confidently agree with someone’s previous identification, if you disagree and want to kick it out to a different classification to get more familiar eyes on it, or if you can narrow it down to a more specific classification.
There are also tabs for Suggestions, Annotations and Data Quality.
The Suggestions tab shows you possible suggestions based on the photo from iNaturalist’s computer modeling. The Annotations tab is where you would add specifications about the type of specimen and see the Projects it is a part of. Your Data Quality tab gives you the opportunity for better data cleanliness and annotation for meeting research grade criteria.
Observation Pages
As with anything about iNaturalist, the website and the app differ a little bit in looks, but you can generally access the same information. The app will be a more condensed version of this, but we’ll use the website as an example.

On any observation page, you will first see the species and genus name, or to whatever extent the organism has been identified to. If it is your observation, you will also see a big Edit button in the top right. Then, you will see a big overview with the associated photos of the organism. Hopefully, with multiple angles and limited to a single individual.
Next to it is a geographical map where the observation was made. If it was obscured, you will get less information about the geographic data. The information above this will tell you about the time of the observation and the user who submitted it. The star below this map will allow you to favorite it, adding it to your Favorites tab.

Below the photos and map, you will see the community which showcases who agrees the ID is what, and whether it is considered Research Grade or not. Below that, you will see Annotations which are helpful in providing additional information about the individual in the observation. It will also show which Projects the observation is a part of; some projects automatically add observations based on geographical location or by taxa. You can modify this in your privacy settings if you want to disallow this.
The Activity feed is where the action happens. Here, we can see that I submitted this observation and, to the best of my ability, I could tell that it was a Bombus bumblebee. (What can I say, I’m a plant person.) From there, folks who are more experienced or researched into the Bombus genus were able to agree with me, but also narrowed it down until we reached Bombus vestalis. There is some disagreement whether this is subspecies vestalis or just B. vestalis.
Whichever one the community agrees on is how the species will be represented as an observation across iNaturalist. That means it started as a generic Bumble Bee, with my identification, but later narrowed down to the Vestal Cuckoo Bumble Bee with the community’s input.
Below this section is often information about copyright licensure, nearby observations, top identifiers of that taxa, and other related information.
The ‘More’ Tab
There are so many features on iNat. This is a good tab to start, however, if you are really interested in learning how to identify better or have research you want to do on a specific taxon. iNaturalists’ official resources live here, as well.

In the “More” tab, you have options to select from, including:
Taxa Info. This is a not-quite-exhaustive resource that is actively being worked on and refined by iNaturalist staff and users. This is worth checking out to start researching species, and covers everything from about to taxonomy and trends.
Guides. This is a section that is no longer being developed as of 2019 and serves as more of an archive of guides that users have curated and edited over time.
Places. This is a similar page to the observations dashboard, but allows you to start from specific places instead.
Site Stats. A range of statistics about observations and usage data across the website.
Help. This brings you to their Help Center’s base search page with their knowledge base and also allows you to fill out tickets for their support team.
Getting Started. What it says on the tin: this is a range of pages that iNaturalist has curated in their Help Center for newcomers. Worth checking out if you think the site feels overwhelming or intimidating.
Understanding Projects. This is a helpful resource to review as an introductory guide if you are interested in joining or starting a project.
Educator’s Guide. A resource that lives in their Help Center dedicated for educational professionals such as teachers or program managers who might want to incorporate iNaturalist into their curricula.
Video Tutorials. A collection of video tutorials from iNaturalist staff in their Help Center.
Curator Guide. This is a guide for iNaturalists’ dedicated curators who help resolve issues with taxa across the site and maintain data cleanliness.
iNat Frequently Asked Questions
References
Can You Search for a Species on iNaturalist?
Yes, you can search for specific species on iNaturalist. On the web version, simply go to the Explore page, and you’ll see a list of all observations and your default filters. You will also see two search boxes. One search box is for Species, and the other for Location. You can select GO from there to search for your species, or you can select additional filters – such as dates observed, categories, ranks, tags, and so on – before performing your search.
If you are on the mobile app, the experience is condensed, but largely the same. You’ll want to open the app and go to the Explore tab in the bottom row which has a magnifying glass icon. From there, select the grey Filters button in the top-right corner. In the overlay that pops up, you’ll see Filter By Taxon right at the top. Click on that, and you can type in which taxa you are looking for, along with selecting any of your desired filters.
How to Use iNaturalist to Identify Birds
To identify birds, it’s best if you are able to get a clear photo of the bird clearly showing its color and identifiable markings. By following the tips for taking good photos for observations above, you’ll be at a distinct advantage in getting your observations identified by the community. iNaturalist does have an option to identify something via sound recording, however, I find that the Merlin Bird ID app is better for birds specifically, as it is a specialized tool developed by Cornell Lab of Ornithology. If you choose to use Merlin for your bird identification, I would still encourage you to upload it to iNaturalist as well, or make sure you are connecting your Merlin account to eBird.
How to Use iNaturalist to Identify a Plant
To identify a plant on iNaturalist, it’s best to use photographs. Again, following the best practices for taking good photos for observations as discussed above, you’ll want to get close to the specimen. It is helpful to have a photo of the habitat, growth structure, and if applicable to the plant, a photo of the leaf structure and patterns both above and below. Try to get pictures of any texture you see on the leaves (either top or bottom) and the stem, as well as where the stem and petals or leaves connect. Take a clear and sharp photo of the flowers, and any stamen or pistils you see. You should also take photos of seeds, fruits, or other reproductive structures that you see. The more information, the better!
Do You Need an Account to Use iNaturalist?
Yes, you do need an account to contribute observations to iNaturalist either on their Next mobile app or on the website. The exception to this is Seek by iNaturalist, which is a great alternative to an account-based experience, but it doesn’t contribute to any of the larger scientific observations databases. For more information about the differences between the two apps, read the Seek VS iNaturalist Next heading above.
What Do the Pin Colors Mean on iNaturalist?
The colors in the iNaturalist explore map are simplified and condensed representations of the observation they are currently classified as. According to iNaturalists’ help article:
Blue represents amphibians, reptiles, birds, mammals, and ray-finned fish.
Orange represents mollusks, arachnids, and insects.
Green represents plants.
Pink represents fungi.
Brown represents chromista such as kelps and diatoms.
Purple represents protozoans such as slime molds.
Grey represents ‘unknown’ observations which have no identifications made yet, or include bacteria and viruses.
You’ll notice on the map view that some are pins and some are circles. The circles have obscured coordinates, which someone might want to place if they want to protect the location or the specimen. For instance, you might choose to obscure the coordinates of an observation that you took in your backyard, but you might also obscure organisms that are listed as endangered or otherwise vulnerable and in need of conservation.
A Note on Accessibility
While these colors are helpful for those who can perceive color, it’s worth noting that this functionality does not currently have a colorblind mode within the app or on the desktop. Users with colorblindness that affects these colors will need to adjust accessibility settings on their computer or mobile phone, or even download a third-party app to modify the color schemes. In the community forums, this feature is already popularly requested along with contrast modes, dark modes, and other accessibility features. It is unknown at the time of this writing whether these features are planned for implementation in future updates.
Do Scientists Actually Use iNaturalist?
Yes, once an observation moves into the Research Grade category, it’s eligible to be used in research. Not only are many scientists and researchers on iNaturalist and can help identify observations, but these qualifying observations make their way into scientific databases which can be used at scale, as well.
This data can be used to help make decisions in land management, conservation prioritization, track diseases and pathogens or the migration of organisms over time. It also helps scientists potentially re-discover organisms that were otherwise thought to be extinct, and discover organisms that have not yet been described.
Who Owns iNaturalist?
iNaturalist is an independent 501(c)3 nonprofit organization as of the publication of this resource, officially formed in 2023. Previously, it was a Masters’ final project between several students, and later was picked up as an initiative by the California Academy of Sciences and National Geographic Society.
Is the iNat App Free?
Yes, the iNaturalist app and website are both free. There are no micro-transactions or paywalls required to access any of the materials.
If you want to donate to the organization, you can do so by opting into a monthly or one-time donation.
While this does not unlock any additional features, you will see a supporter badge appear on your profile with the iNaturalist green font and bird logo. iNaturalist has added this badge as a way to recognize your support.
Troubleshooting the iNaturalist Next App Freezing
Especially with older versions of the app, there was a bug with it freezing and not allowing you to do anything within the app. It appears later versions fixed this bug, but some people still experience it, which can make the functionality of the app frustrating to say the least. If you’re experiencing that bug, or similar bugs in the app (or website), there is a bug report section of the forum that you can submit a report to. Bugs may appear with any update, and with any version on either device type. That’s just the nature of programming and technology.
If you’re just looking to troubleshoot the problem, following a couple of basic steps will usually fix the issue. First, make sure your phone has the latest OS version. Check for updates in your settings if you aren’t sure. Then, make sure that the iNaturalist app doesn’t have a pending update; you can usually check this by looking for the already-downloaded app in the app store. If it has an “Update” button, click that.
If that hasn’t resolved the issue, try logging out of your iNaturalist app and logging back in. It seems simple, but it can soft-refresh the app experience for you. If that doesn’t work, try un-installing and re-installing the app.
If you are still experiencing issues with bugs after these steps, it’s time to submit a bug report on the community forum.
References
References
- NPR.org, a new study reveals an unprecedented discovery of new species, https://www.npr.org/2025/12/13/nx-s1-5629237-e1/a-new-study-reveals-an-unprecedented-discovery-of-new-species
- Help.inaturalist.org, How to take Identifiable Photos – Video Tutorial, https://help.inaturalist.org/en/support/solutions/articles/151000170787
0 Comments